Attaching Cypress screenshots to your Mochawesome report
On my previous post, we looked at how we can generate Mochawesome report from our Cypress tests. I received some really great feedback and I wanted to explore more of Mochawesome’s features since I am still fairly new at it. The great thing about the testing community is that people will share ideas on what can be improved. One of the topics that came up was around attaching Cypress screenshots to the report whenever any of the tests fail. In this blog post, I’ll walk you through the steps on how you can achieve this. If you haven’t read my previous post, I recommend that you do so you have the basic understanding on how to setup Mochawesome with Cypress.
Cypress Screenshots
As you might know already, Cypress will automatically take a screenshot of your test whenever it fails. By default, this is saved on cypress/screenshots folder directly however we can specify where want to save it by modifying the screenshotsFolder options in our cypress.json file. Let’s modify this so the screenshots will be saved to the folder where our mochawesome HTML report is stored.
"reporter": "../node_modules/mochawesome/src/mochawesome.js",
"reporterOptions": {
  "overwrite": false,
  "html": false,
  "json": true
},
"screenshotsFolder": "TestReports/assets"
Now when you have a failed test, the screenshot should now be saved to the folder that you have specified.
Cypress Event Listener
In order to attach the screenshot after our test is run, we need to listen to a Cypress event called test:after:run and add our additional code. We can add this in our Cypress support/index.js file because this file is processed automatically before and/or after our test execution.
Cypress.on('test:after:run', (test, runnable) => {
 // add code to attach screenshot to mochawesome report here
});
Mochawesome Context
Now that we know which Cypress event to listen to, we need to tell Mochawesome that we want a screenshot to be included in our report. This can be done by using addContext. According to their documentation site:
“Mochawesome ships with an addContext helper method that can be used to associate additional information with a test. This information will then be displayed inside the report.”
The addContext accepts two parameters. The first parameter is the test object itself and the second parameter is the new information or context that we want to add. In our case, we want to pass in the path to where our screenshot is stored.
Before we do that, I just want to show a code snippet of adding a random string on this context to show where this gets added in mochawesome.
import addContext from 'mochawesome/addContext';

Cypress.on('test:after:run', (test, runnable) => {
 addContext({ test }, 'test');
});
Now when we run our tests, mochawesome will generate a JSON output which should now include a new property called context with test as its value.
Putting it all together
Ok, now we know what addContext does, let’s modify this to pass the path of our Cypress screenshot instead!
import addContext from 'mochawesome/addContext';

Cypress.on('test:after:run', (test, runnable) => {
 if (test.state === 'failed') {
  const screenshot = `${Cypress.config('screenshotsFolder')}/${Cypress.spec.name}/${runnable.parent.title} -- ${test.title} (failed).png`;
  addContext({ test }, screenshot);
 }
});
We are only interested to attach the screenshot if our test failed hence the if statement. We then get the value of our screenshot and pass this as a string to our addContext method. The screenshot variable here is a combination of different variables but basically it consists of:
- Our screenshots folder name that we defined in our cypress.json which can be returned by calling Cypress.config(‘screenshotsFolder’).
- Our spec file name which can be returned by calling Cypress.spec.name
- The parent title of our test which can be returned by calling runnable.parent.title
- Finally, the test name itself which can be returned by calling test.title
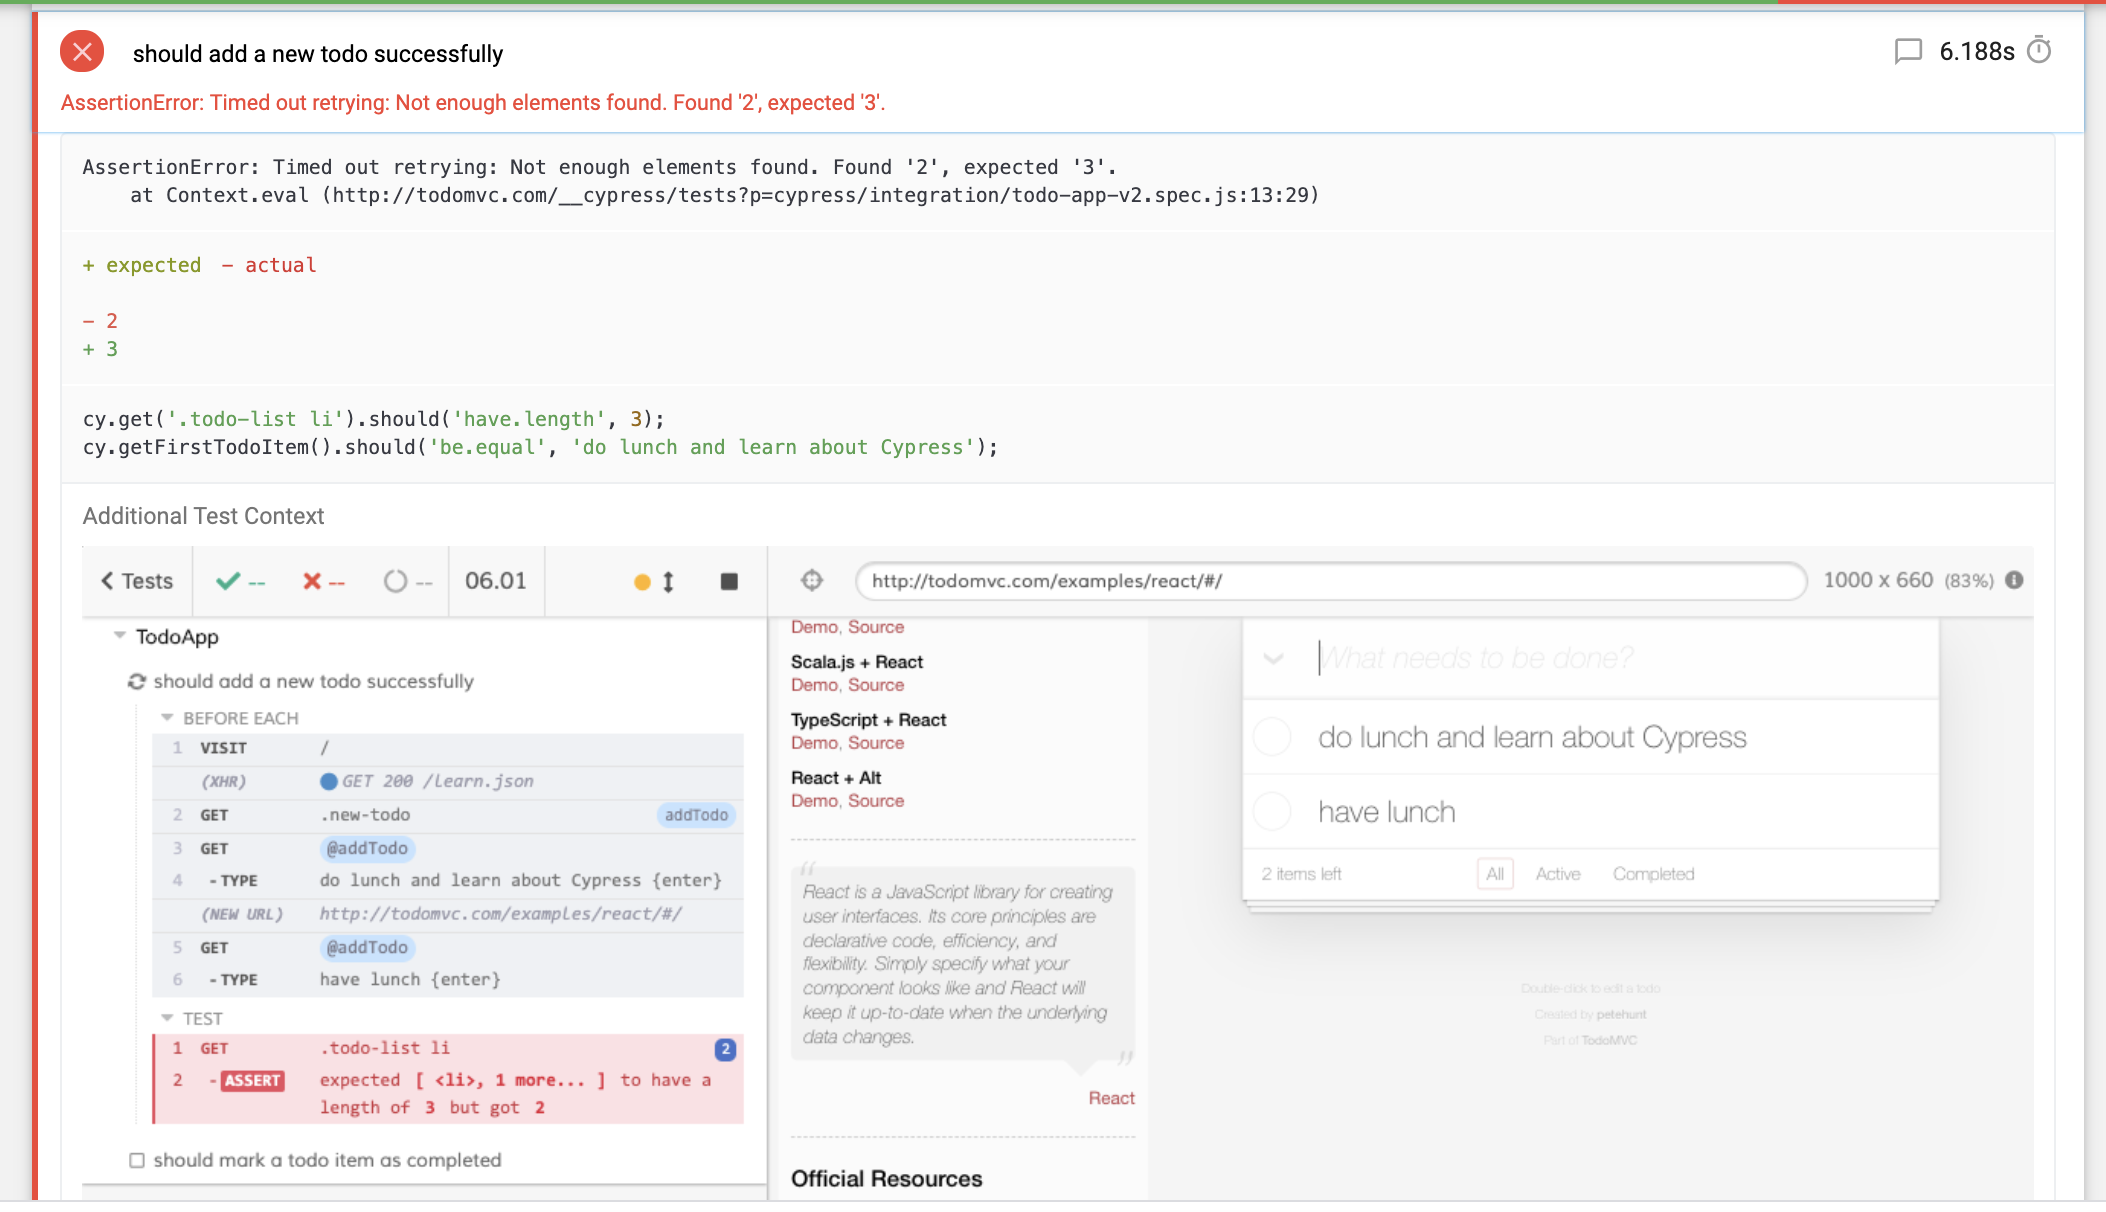
Here is our Mochawesome report with Cypress screenshots attached. 🙂

If the screenshot doesn’t show on the report, make sure that the file path of your screenshot image is correct.
Anyway, I hope you found this post useful! If you want to view the full solution, please refer to my github repo here.