Uploading data to AWS S3 using AWS CLI
If you want to learn how you can store data to AWS S3 from the command line, then this post is for you! In this tutorial, I will show you how to upload data to an S3 bucket using AWS CLI. The scenario that I will use for this tutorial is specific to one of our requirements from work but the same command can be use to upload any type of data.
Scenario
For our visual tests, initially, we just stored our baseline images to our Github repo since we don’t have a lot of it so storing it in our repo seemed to be a good idea at that time. However, one of my work colleague noticed that when he pulls the repo locally, it’s slow as the baseline images are quite big. The only sensible solution is to store these images to an AWS S3 bucket and then create commands to upload and download the images before running the tests.
If you are not familiar with AWS S3, S3 stands for Simple Storage Service, which is one of the services provided by AWS that allows you to store and retrieve different types of data easily. There are couple of ways on how you can upload data to S3.
- Using the AWS Management Console
- Using AWS CLI (command line interface)
- Using different AWS SDKs and programming toolkits (Go, Java, JavaScript, .NET, etc..)
Pre-requisites
This tutorial requires the awscli to be installed locally. You can find the instructions on how to install it here. What’s great about awscli version 2.0 is that it doesn’t have any other external dependencies for it to work as everything that’s needed is already bundled together. Prior to this, you would need to have python installed as well.
This tutorial also assumes basic understanding of AWS so you need to have an AWS account as you will need to have your AWS access and secret keys to use the awscli locally.
You also need to have a bucket created in S3. For tutorials on how to do this, you can read the documentation from AWS here or watch this video here.
Getting Started
To check if you have installed awscli correctly, you can run aws --v which should print the version.
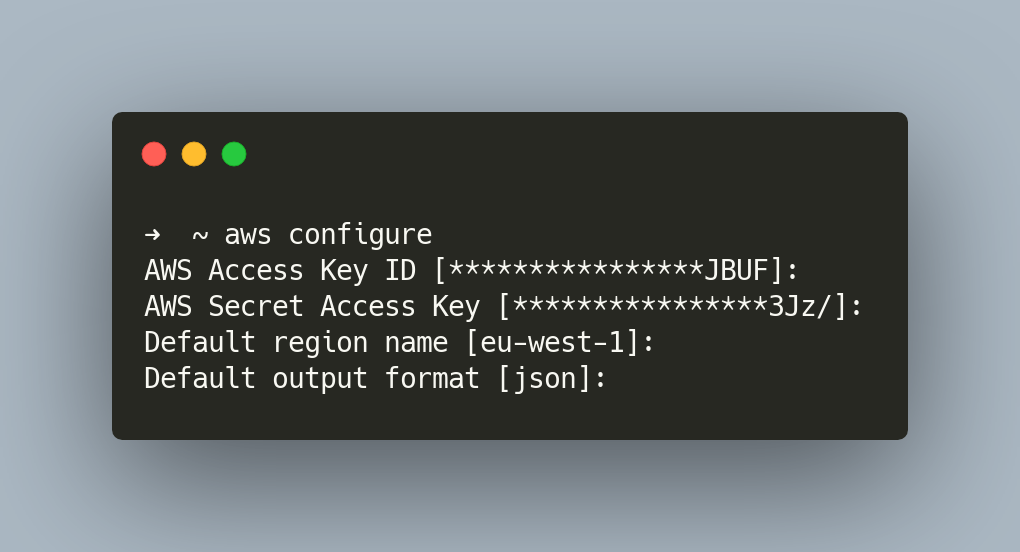
You also need to store your AWS keys locally. The simplest way to do this is by running the command aws configure.
This will ask for your input to provide your AWS Access Key, Secret Key, Default region name and output format similar to the output below.

These data will then be stored on these two files ~/.aws/config and ~/.aws/credentials.
Using S3 command to upload data
There’s actually two S3 commands that you can use to upload data to S3 - sync and copy commands. The copy command can be used to copy individual files. If you wish to copy all files on a directory, you would need to pass the --recursive option. On the other hand, the sync command will copy an entire directory to the s3 bucket.
In my scenario, the sync command sounds like the better option. To store the data that you want using sync, you can use the command below.
aws s3 sync <origin folder> <bucket name>
In this case, all my baseline images are stored in the cypress/snapshots origin folder and I want it to be synced to my bucket nu-sun-web-e2e-automation. When you run this, you should see a series of output saying that your data has been uploaded to the given bucket. What’s good as well is that if there are any changes to the baseline images, running the above command will only sync the modified files.
Integrating with our Cypress workflow
Now that I’ve stored our baseline images to S3, I can now delete the baseline images locally. However, before we run our visual tests on our CircleCI pipeline, we need to download the data first from s3.
To download the data from the bucket to your local machine, you just need to swap the command above so your origin is the s3 bucket and destination is your local directory.
I also created two npm commands to make it easier to remember as shown below:
"upload:snapshots:s3": "aws s3 sync cypress/snapshots s3://nu-sun-web-e2e-automation",
"download:snapshots:s3": "aws s3 sync s3://nu-sun-web-e2e-automation cypress/snapshots"
Then all you would need to do is to just run:
npm run upload:snapshots:s3
npm run download:snapshots:s3
The next step for me was to create a job in CircleCI to download the images first. This meant that I needed to have AWS and Node in a docker image somewhere. The good thing was one of our DevOps engineer already created an executor with these dependencies installed so it made my life simpler.
And that’s it! It’s quite simple to use awscli so if you have a requirement to store large amount of data to s3 like I did, then give the sync command a try. 🙂