Creating your first test with TestCafe
While I have been using Cypress as our go to test framework for work projects, I still like to learn new testing tools for personal reasons. One of the testing tools that I’ve seen that is often compared to Cypress is TestCafe. In this blog post, we’ll look at what TestCafe is, list some of its features and then we’ll go ahead and write our first test.
What is TestCafe?
TestCafe is a Node.js tool use for automating the web that uses a web proxy instead of WebDriver to inject a driver script which then simulates user actions. The creators, DevExpress, created the tool for the purpose of being able to run tests on different browsers without the need to install additional drivers or libraries. Unlike Cypress or Puppeteer which is run directly on a browser, TestCafe tests are run inside a proxy server which then controls your test page.
TestCafe Features
Its best selling point in my opinion is the ability to run your tests on all browsers and mobile browser versions without the need to install additional drivers or dependencies. It works outside the box. Similar with Cypress, it is easy to setup and it will automatically wait for your elements to be visible before interacting with it. However, if you are already used to using popular test frameworks like Mocha, it might take some time to get used to TestCafe syntax. Regardless, their documentation site provides a lot of examples on how to use their APIs so the syntax might not be an issue in the end.
Other features include (this is not the exhaustive list):
- Built in Iframe support
- Ability to intercept and mock HTTP requests
- Run tests in parallel without additional configuration
- JS errors reported directly to your test run
- Ability to run tests on cloud based services like BrowserStack
Setting up TestCafe
To get started, you need to install the testcafe package.
npm i --save-dev testcafe
To run the tests, you just need to run the following command.
npx testcafe chrome tests/
With the above command, you need to add your test files under a folder called tests. If you need to run a single test file, just replace the path with the file instead. If you need to run the same tests on a different browser, you just need to replace the browser name. A list of browser alias can be found here. To run the tests headlessly, just need to add the headless keyword like so.
npx testcafe chrome:headless tests/
Writing our first test
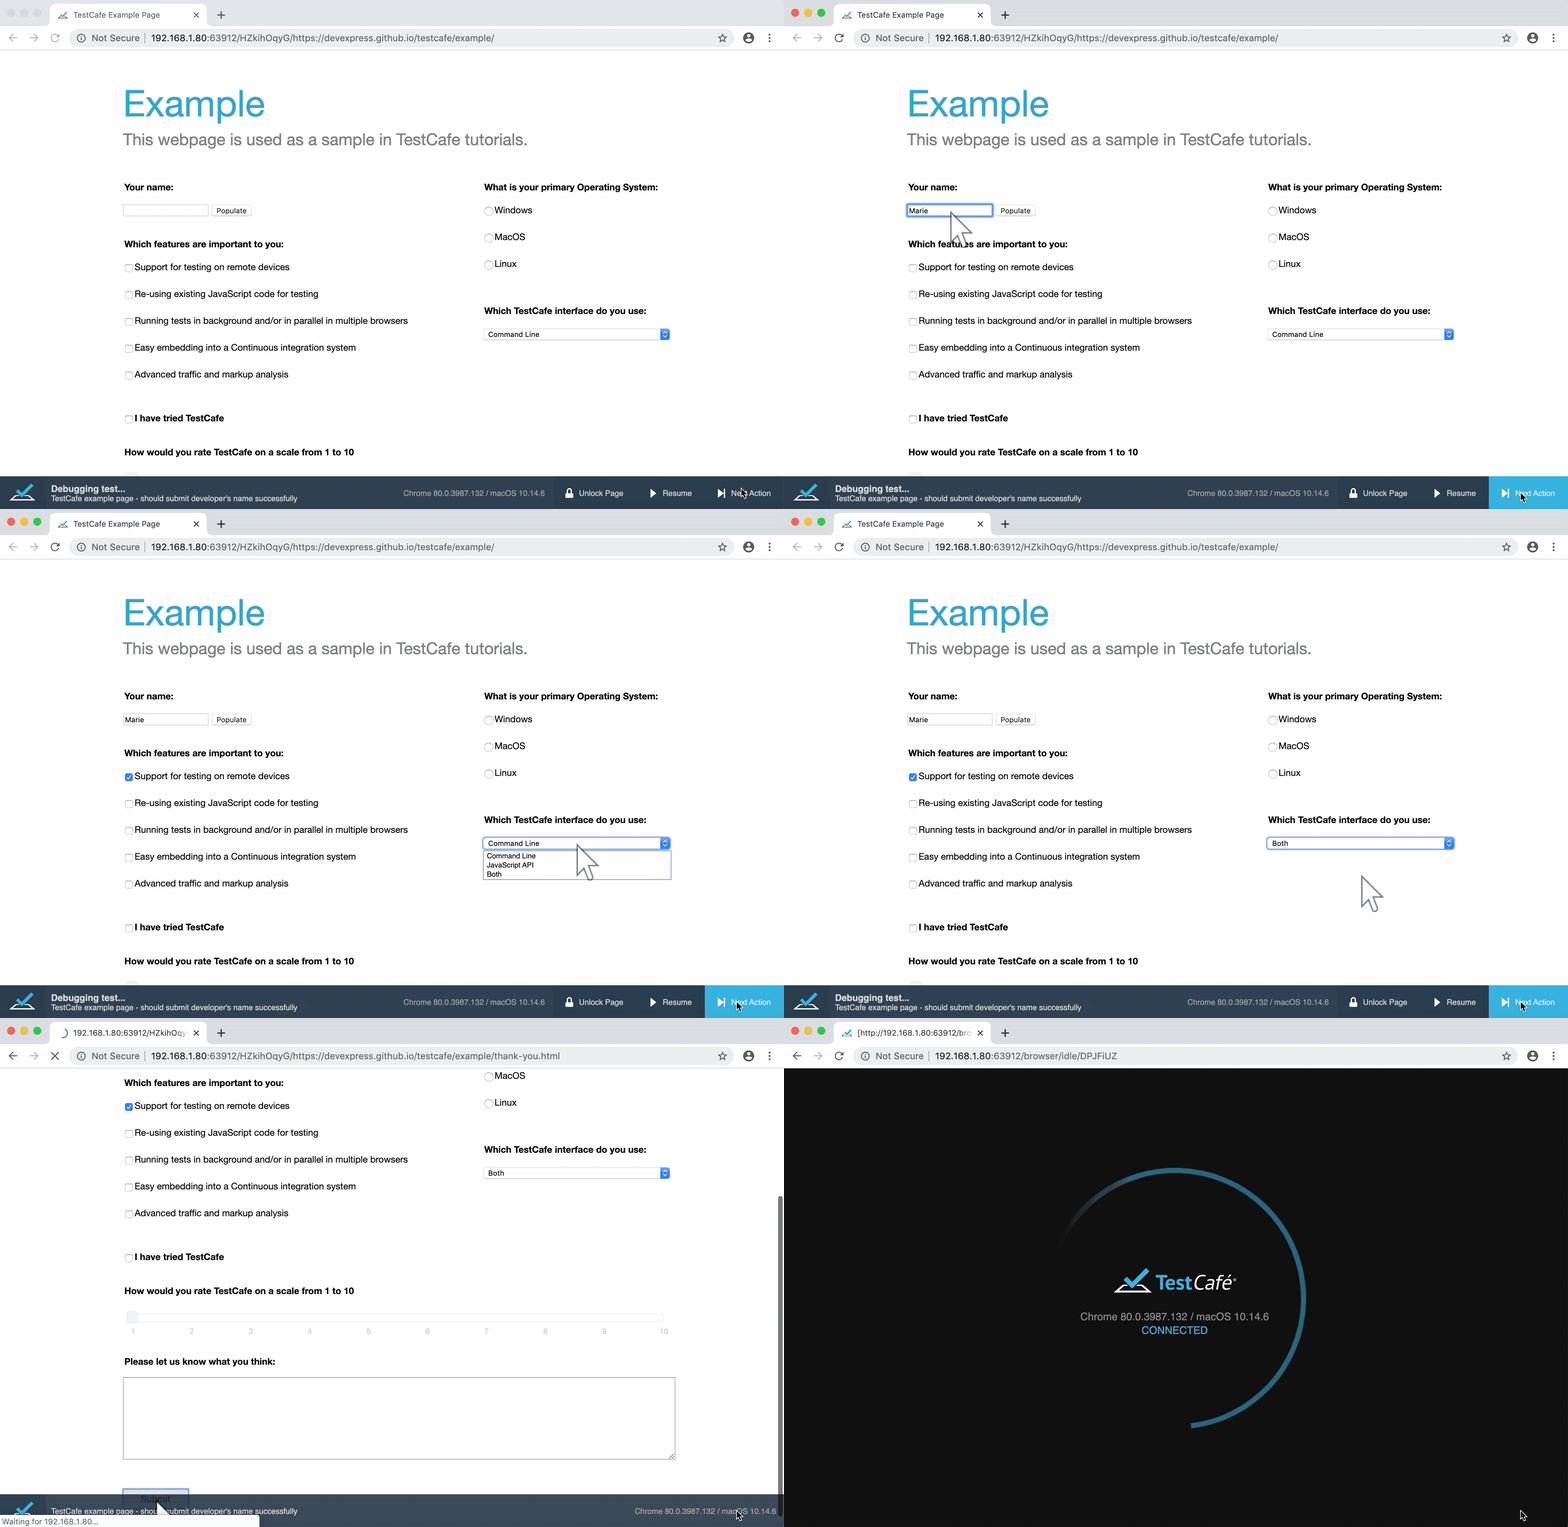
For our first test, I will be using their example page where I will fill in a form and assert that my response has been submitted successfully. Let’s go ahead and create a test file called sample-testcafe-test.js.
To define what our test feature is, we need to pass the feature name to fixture followed by invoking page which is used to load up our example page. In TestCafe, to interact with an element, we need to import Selector and pass the selector of our DOM element.
import { Selector } from 'testcafe';

// Fixture serves as the name of our feature.
// Think of it as the describe hook in mocha
// page() opens the test URL on your browser of choice
fixture('TestCafe example page').page(
  'https://devexpress.github.io/testcafe/example/'
);

test("should submit developer's name successfully", async user => {
  // To interact with a DOM element, we must use the Selector function
  const interfaceSelect = Selector('#preferred-interface');
  const interfaceOption = interfaceSelect.find('option');

  await user
    .typeText('#developer-name', 'Marie')
    .click('#remote-testing')
    .click(interfaceSelect)
    .click(interfaceOption.withText('Both'))
    .expect(interfaceSelect.value)
    .eql('Both')
    .click('#submit-button')
    .expect(Selector('#article-header').innerText)
    .eql('Thank you, Marie!');
});
TestCafe uses a series of different commands for typing a text to a field, clicking buttons and dropdowns and then asserting that our form has been submitted successfully. One thing to note here is that async/await keyword must be used for the tests to work. The finished test can be found on this GitHub repo as well.
If you need to debug the tests in TestCafe, you can either:
- call the .debug() command on any commands that you wish to debug.
.typeText('#developer-name', 'Marie').debug();
- pass the parameter –debug-mode when you run the tests which will run the debugger on every action.
npx testcafe chrome tests/ --debug-mode
Apart from these two commands, you can also debug your tests using Visual Studio Code or Chrome DevTools as listed here.

Thoughts
TestCafe looks like a promising tool especially if you have a requirement to support a lot of different browsers and you don’t like to install or manage the different libraries. With everything, you need to decide which automation tool would give you the most benefit as there is not a single tool out there that can provide all the features you need. Apart from this package, they also have a commercial tool called TestCafe Studio which provides an IDE for writing and recording automated tests easily without writing any code, which in my opinion, can be useful if you have non-technical members of the team who wish to contribute to test automation.